How to Measure Air CO2 Cheaply: Budget Options
If you’ve ever wondered how to measure air CO2 cheaply without spending a fortune on lab-grade equipment, you’re not alone. From indoor gardeners to science students, more people are looking for accessible ways to monitor carbon dioxide levels in their environments without breaking the bank.
The good news is that affordable CO2 measurement has never been more achievable. A growing range of low-cost electronic sensors, simple chemical tests, and even smartphone-connected devices now make it possible to get reliable readings on a tight budget. This guide walks you through every practical option available today.
Understanding CO2 Sensor Technologies
Most affordable CO2 sensors use one of two core technologies: Non-Dispersive Infrared (NDIR) or electrochemical detection. NDIR sensors are generally considered the gold standard for accuracy even at budget price points.
NDIR sensors work by shining infrared light through a gas sample and measuring how much CO2 absorbs that light. This method is stable, long-lasting, and widely used in consumer-grade devices.
Electrochemical sensors are cheaper but tend to drift more over time. They are better suited for short-term experiments than for continuous environmental monitoring.
CO2 carbonation science underpins how these sensors detect and quantify gas concentrations in the surrounding air. Understanding the basic chemistry helps you choose the right tool for your specific use case.
Budget-Friendly Sensor Options and Price Comparison
Entry-level CO2 monitors can be found for as little as $20 to $30 online, though accuracy varies significantly at this price range. Mid-range options between $50 and $100 typically offer NDIR technology and much better reliability.
Spending just a little more on a mid-range NDIR sensor can dramatically improve your data quality. It is worth comparing features carefully before committing to the cheapest available option.
Comparing sensor brands by reputation, features, and price is an essential step before purchasing. Some budget brands offer surprisingly competitive specs when stacked against premium names.
Chemical vs. Electronic Measurement Methods
Electronic sensors give you continuous, real-time readings and are ideal for ongoing monitoring. Chemical methods, by contrast, are one-time or batch tests that work well for classroom experiments or occasional spot-checks.
Chemical indicators like bromothymol blue or limewater change color in the presence of CO2. These reagents can cost under $5 for a full classroom experiment, making them the cheapest possible option for basic detection.
The trade-off is precision. Chemical tests tell you that CO2 is present but rarely give you an accurate parts-per-million reading the way an electronic sensor does.
Calibration Procedures for Affordable Sensors
Even a good budget sensor will give you poor data if it is not properly calibrated. Calibration aligns your sensor’s output with a known reference concentration, usually fresh outdoor air at approximately 400 ppm.
Most affordable sensors support Automatic Baseline Correction (ABC), which recalibrates the sensor automatically over time when exposed to outdoor air. This is the simplest hands-off calibration method available.
Sensor calibration methods and the frequency of recalibration are critical factors that directly affect the accuracy of your readings. Neglecting calibration is one of the most common reasons budget sensors underperform.
DIY CO2 Detection for Science Experiments
Building your own CO2 detector is a rewarding project that can cost as little as $15 to $25 in parts. The most popular DIY approach uses a bare MH-Z19 or SCD40 sensor module connected to a microcontroller like an Arduino or Raspberry Pi.
Open-source code libraries make it relatively easy to get readings displayed on a small screen or logged to a spreadsheet. A complete DIY CO2 monitor can be assembled in under two hours with basic soldering skills.
This approach is especially popular among hobbyists who grow plants indoors, since CO2 levels directly affect plant growth rates. If you grow plants indoors, pairing your CO2 monitor with knowledge about indoor superfoods can help you optimize your growing environment.
Limewater Testing and Simple Detection Techniques
Limewater (calcium hydroxide solution) turns milky white when CO2 is bubbled through it. This is one of the oldest and most reliable qualitative tests for carbon dioxide, commonly used in school science labs.
To run the test, you simply exhale through a straw into a container of limewater and observe the color change. The faster and more opaque the cloudiness, the higher the CO2 concentration in the tested air sample.
While limewater cannot give you a ppm reading, it is a powerful teaching tool. It also costs almost nothing to prepare, making it the most budget-friendly detection method of all.

Accuracy and Reliability of Budget CO2 Sensors
Budget sensors typically advertise accuracy within ±50 to ±100 ppm of actual CO2 concentration. For most home, greenhouse, or classroom applications, this level of precision is entirely sufficient.
Reliability drops significantly in sensors priced below $20. At that price point, you are often buying a VOC sensor that estimates CO2 rather than directly measuring it, which can be misleading.
Always check whether a sensor uses true NDIR technology before purchasing, especially if you plan to use the data for any scientific or agricultural decision-making.
Data Logging Integration for Student Projects
Many affordable sensors can be paired with simple data logging setups to record CO2 levels over time. A Raspberry Pi Zero with a compatible sensor module is a popular and inexpensive combination for this purpose.
Free software tools like InfluxDB and Grafana allow you to visualize logged CO2 data in real time through a web browser. This kind of setup can be built for under $40 total and makes an impressive science fair project.
For students exploring environmental science, tracking CO2 alongside plant growth data adds a meaningful layer of analysis. This connects well with broader explorations of AI in agriculture and how technology is reshaping how we grow food.
Real-World Performance Testing Against Lab Standards
Independent tests consistently show that mid-range NDIR sensors perform within acceptable margins when compared to laboratory-grade instruments. The gap in accuracy between a $70 consumer sensor and a $700 lab sensor is often smaller than expected.
Performance degrades most noticeably in extreme humidity or temperature conditions. Operating your sensor within its rated temperature and humidity range is essential for maintaining accuracy.
For greenhouse use, where both temperature and humidity can fluctuate widely, choosing a sensor with a wide operating range is worth the small additional cost.
Smartphone App-Based CO2 Measurement Solutions
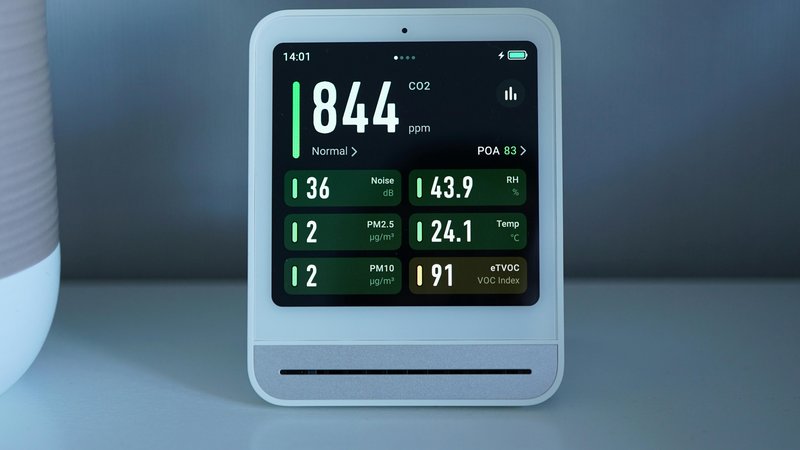
Several Bluetooth-connected CO2 monitors now pair directly with smartphone apps, giving you a clean interface for viewing and storing data. These devices typically fall in the $50 to $80 price range.
App-based solutions are convenient for non-technical users who want CO2 data without building or configuring anything. The apps often include alerts when CO2 levels exceed safe thresholds.
Sensirion’s CO2 gadget is a well-regarded example of a compact, app-connected sensor that balances affordability with genuine NDIR accuracy. It represents the kind of value-for-money option that makes budget CO2 monitoring genuinely practical.
Long-Term Maintenance and Sensor Durability
Most NDIR sensors are rated for several years of continuous use before their light source degrades. Keeping the sensor clean and free from dust buildup is the most important maintenance step.
Avoid exposing budget sensors to high concentrations of other gases like volatile organic compounds, which can interfere with readings over time. Store sensors in a sealed bag when not in use to extend their lifespan.
Periodic recalibration, as recommended by the manufacturer, will keep your sensor performing accurately throughout its rated service life.
Troubleshooting Common Sensor Errors
The most common issue with budget CO2 sensors is a persistent drift toward readings that are too high or too low. This is almost always a calibration problem rather than a hardware failure.
If your sensor consistently reads above 500 ppm in a well-ventilated outdoor location, it needs to be recalibrated. Placing it outside in fresh air and running a manual calibration cycle usually resolves the issue.
Condensation inside the sensor housing is a leading cause of permanent sensor damage. Always ensure adequate ventilation around the sensor and avoid placing it near cold surfaces where moisture can form.
Cost-Benefit Analysis of Different Approaches
Chemical methods cost almost nothing upfront but provide no ongoing data and require repeated purchases of reagents. They are best suited for one-off experiments or educational demonstrations.
DIY electronic sensors offer the best long-term value if you are comfortable with basic electronics. A well-built DIY unit can outperform many commercial budget options at a lower total cost.
For most users, a $50 to $80 commercial NDIR sensor offers the best balance of accuracy, convenience, and cost. It requires no assembly and delivers reliable readings from day one.
Safety Considerations for CO2 Measurement Equipment
CO2 itself is not toxic at the concentrations found in most indoor environments, but elevated levels above 5,000 ppm can cause drowsiness and impaired judgment. Monitoring is a sensible precaution in enclosed spaces.
When working with chemical detection reagents like limewater, standard lab safety practices apply. Avoid contact with eyes and skin, and work in a ventilated area.
Never use a CO2 sensor as a substitute for a dedicated safety alarm in industrial or confined-space environments. Budget consumer sensors are not certified for life-safety applications.
Practical Applications in Greenhouses and Grow Tents
Plants thrive at CO2 concentrations between 1,000 and 1,500 ppm, well above the ambient outdoor level of around 400 ppm. Monitoring CO2 in a greenhouse or grow tent allows you to optimize supplementation for maximum plant growth.
A budget CO2 monitor placed at canopy height gives you the most relevant readings for plant health. Positioning the sensor correctly is just as important as choosing the right sensor.
Whether you are growing vegetables, herbs, or other crops in an enclosed space, having accurate CO2 data transforms guesswork into informed growing decisions. The upfront cost of even a mid-range sensor pays for itself quickly in healthier, more productive plants.